Air Filter Maintenance: How to Clean and Change Yours
Air Filter Maintenance: How to Clean and Change Yours
The Importance of Regular Air Filter Maintenance

Your air filter is one of the most important components of your HVAC system, but it’s often overlooked when it comes to maintenance. A clean and well-maintained air filter can improve the efficiency and effectiveness of your system, while a dirty filter can lead to decreased performance, increased energy bills, and even damage to your equipment. In this article, we’ll show you how to clean and change your air filter to keep your system running smoothly and efficiently.
Why Clean and Change Your Air Filter?
Before we dive into the how-to’s, let’s take a look at why air filter maintenance is so important.
- Improved Indoor Air Quality: A dirty filter can circulate dust, allergens, and irritants throughout your home, exacerbating respiratory issues and affecting your overall health.
- Increased Energy Efficiency: A clogged filter can increase your energy bills by up to 20% due to decreased air flow and increased motor strain.
- Extended Equipment Life: A dirty filter can cause your HVAC system to work harder, leading to premature wear and tear, and potentially costly repairs.
- Better System Performance: A clean filter ensures that your system can run at its optimal levels, keeping your home at a comfortable temperature and humidity level.
- Turn off the Power: Make sure the power to your HVAC system is turned off before starting the cleaning process.
- Remove the Filter: Locate the filter and gently pull it out of the housing. Depending on the type of filter you have, it may be held in place by screws, clips, or other fasteners.
- Vacuum the Filter: Use a vacuum cleaner to remove any loose debris and dust from the filter.
- Mist with Water: Use a gentle spray of water to loosen any remaining debris and help dislodge stubborn particles.
- Rinse with Damp Cloth: Wipe the filter clean with a damp cloth to remove any remaining dirt and dust.
- Allow to Dry: Let the filter air dry completely to prevent any further damage or trimming.
- Locate the Filter: Find the filter housing and remove it, following the same process as above.
- Dispose of the Old Filter: Properly dispose of the old filter, taking care not to release any remaining debris or dust into the air.
- Install the New Filter: Insert the new filter into the housing, making sure it’s properly seated and secure.
- Replace the Housing: Put the housing back in place, ensuring it’s securely fastened.
- Check Your Filter Size: Make sure you have the correct size filter for your system to avoid any compatibility issues.
- Use a Soft-Bristled Brush: For more stubborn debris, use a soft-bristled brush to gently sweep away particles without damaging the filter.
- Label Your Filters: Consider labeling your filters with the date and type to ensure you remember when to replace them.
- Schedule Regular Maintenance: Set a reminder to clean and change your filter every 1-3 months, depending on your system and usage.
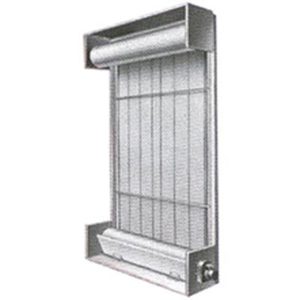
Cleaning Your Air Filter
Cleaning your air filter is a relatively simple process that can be done with a few basic tools and materials. Here’s a step-by-step guide:
Changing Your Air Filter
In some cases, your filter may need to be replaced rather than cleaned. Here’s how to do it:
Tips and Tricks
Here are a few additional tips to keep in mind when cleaning and changing your air filter:
Conclusion
In conclusion, cleaning and changing your air filter is a simple yet crucial task that can have a significant impact on your HVAC system’s performance and your overall comfort. By following the steps outlined above, you can ensure your filter is running at its best, keeping your home safe, healthy, and energy-efficient. Don’t neglect your filter – take control of your air quality today!
It seems you’ve sent a prompt, but there’s nothing specific or clear. Please provide more context or details about what you’d like to talk about or ask, and I’ll do my best to assist you!