DIY Air Filter Parts Installation: A Step-by-Step Guide

DIY Air Filter Parts Installation: A Step-by-Step Guide
Clean air is essential for healthy living, and a proper air filter is crucial for maintaining indoor air quality. Many homeowners and DIY enthusiasts are turning to do-it-yourself (DIY) air filter parts installation as a cost-effective and environmentally friendly solution. In this article, we will guide you through the process of installing DIY air filter parts in your home, highlighting the key elements, applications, and benefits.

Choosing the Right Air Filter Parts
Before starting the installation process, it is essential to choose the right air filter parts for your specific needs. Here are some key factors to consider:
- Air Quality: Determine the level of air pollution in your area to select the proper MERV (Minimum Efficiency Reporting Value) rating. A higher MERV rating ensures more efficient filtration.
- Airflow: Consider the airflow requirements for your space. Higher airflow demands may require a more powerful filter.
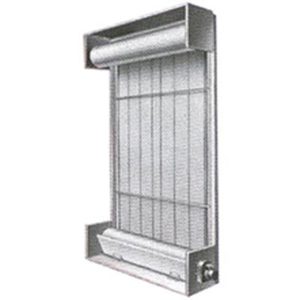
- Compatibility: Ensure that the air filter parts are compatible with your HVAC system and other installed filters.
Step-by-Step Installation Guide
Step 1: Prepare the Workspace
*"Gather Essential Tools": Before beginning the installation, ensure you have the following tools: screwdriver, pliers, filter clamp (if necessary), and a vacuum cleaner. [1]
Step 2: Remove Old Filter
*"Identify and Remove the Old Filter": Locate the old filter and carefully remove it. Take note of the old filter’s size, shape, and mounting style.
Step 3: Inspect and Clean the Unit
*"Inspection and Cleaning": Use a vacuum cleaner to remove any debris or dust from the filter housing. Inspect the unit for any damage or corrosion and clean it as necessary.
Step 4: Install the New Filter
*"Filter Installation": Place the new filter in the housing, ensuring it is properly seated and secure. If necessary, use the filter clamp to hold it in place.
Step 5: Secure the Filter
*"Secure the Filter": Use the screwdriver to secure the filter clamp (if necessary) and the retaining clips to ensure a tight seal.
Step 6: Reassemble the Unit
*"Reassemble the Unit": Reconnect any loose components, such as electrical connections, and ensure they are securely fastened.
Additional Tips and Considerations
- Regular Maintenance: Schedule regular filter replacements and maintenance to maintain optimal air quality.
- Filter Cleaning: Clean or replace the filter regularly to ensure maximum air quality.
- Professional Assistance: If you’re not comfortable with the installation process, consider hiring a professional to ensure a proper installation.
Conclusion
In conclusion, a well-planned and executed DIY air filter parts installation can significantly improve indoor air quality, reduce energy bills, and create a healthier living environment. By following the step-by-step guide and considering the factors mentioned above, you can successfully install and maintain your air filter parts for years to come.
References
[1]: Be sure to refer to the manufacturer’s instructions for specific guidance on tool requirements and any additional steps necessary for the particular air filter or system you are working with.
Keywords: DIY Air Filter, Air Quality, MERV Rating, Airflow, Compatibility, Installation, HVAC System, Filter Replacement, Indoor Air Quality, Home Maintenance.
I’m here to help! What would you like to talk about or ask? Do you have a specific topic in mind, or would you like me to suggest some prompts to get us started?