Air Filter Installation: A DIY Guide for Homeowners
Air Filter Installation: A DIY Guide for Homeowners
Understanding the Importance of Air Filter Installation
As a homeowner, maintaining a healthy and comfortable living space is crucial. One often overlooked, yet vital component of indoor air quality is the air filter. In this DIY guide, we will walk you through the process of installing an air filter in your home to ensure clean and healthy air circulation.
Why Should You Install an Air Filter?
Indoor air pollution is a significant concern for many homeowners, with sources ranging from cooking and cleaning chemicals to pet dander and dust. Air filters act as a first line of defense, capturing pollutants and allergens, leaving the air cleaner and healthier for you and your family to breathe.
Choosing the Right Air Filter
Before installing an air filter, it’s essential to choose the right one for your specific needs. Consider the following factors:
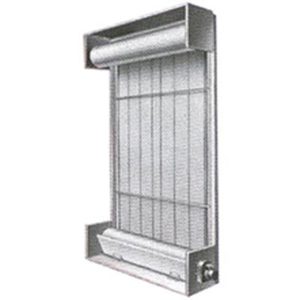
- Filter Type: Choose from fiberglass, pleated, HEPA, or activated carbon filters, each suited for specific applications and pollutant captured.
- MERV Rating: Measure of the filter’s ability to capture particles, with higher ratings capturing smaller particles.
- Square Footage: Calculate the approximate square footage of your home to determine the correct filter size.
Step-by-Step Air Filter Installation Guide
Step 1: Locate the Air Filter
Identify the air filter’s location, usually in the return air duct or furnace, in the wall or ceiling, or behind a removable grille.
Step 2: Switch Off the Power
Turn off the power to the HVAC system to ensure your safety while working with electricity.
Step 3: Release the Filter
Gently pull the filter out of its housing, taking note of any clips, screws, or latches holding it in place.
Step 4: Install the New Filter
Insert the new filter into the housing, ensuring a snug fit. Make sure it’s properly seated and secure.
Step 5: Replace the Filter Assembly
If applicable, reattach the filter to the housing using the same clips, screws, or latches you removed.
Step 6: Turn On the Power
Switch the power back on to the HVAC system.
Additional Tips and Tricks
- Replace filters regularly: Typically every 1-3 months, depending on usage and manufacturer recommendations.
- Use a filter designed for your specific HVAC system: Consult your manufacturer’s guidelines for recommended filter types and sizes.
- Consider adding a UV air purifier: For advanced air purification and enhanced indoor air quality.
Conclusion
By following this DIY guide, you can easily install an air filter in your home, ensuring a healthier and more comfortable living space. Remember to regularly replace filters, choose the right type for your system, and consider additional air purification solutions for optimal indoor air quality.
Keywords: air filter installation, DIY guide, indoor air quality, HVAC system, MERV rating, filter type, filter size, air purifier, UV air purifier
I’m happy to help! However, I don’t see a prompt or question from you. Could you please go ahead and ask me a question, provide more context, or share what’s on your mind? I’m looking forward to our conversation!